Saturday, November 17, 2012

Photometry


This is a brief summary of my early attempts at measuring the light curves for short period binary stars.  My initial attempt has been sort of a proof of concept using Algol as a target.

Objective:
Produce a light curve of the minimum of the transit of Algol

Equipment:
  • Canon xTi
  • Standard photography tripod
  • Canon remote timer
Method:

During the late fall and winter Algol is in an excellent location in the sky for photography. To complete the light curve analysis I'm looking for its not actually necessary to photograph the entire period of the binaries rotation; photographing the length of the minimum is the primary goal.  Fortunately for me Algol has been well studied and the time of the minimum on any given day is available on the Sky and Telescope website:

Sky & Telescope Algol Minimum Calculator

The Algol binary system has a period of 2.8 days and the transit of Algol b takes 10 hours from start to finish.  Ideally this entire transit is what should be photographed.  However this requires 10 hours of clear dark skies during which the minimum occurs.  This is rare and so far I haven't been able to photograph more than a few hours at a time.

Results:

This past weekend I attended the Alberta Science Teachers Conference in Banff and Thursday November 15th at 11:56 pm was a predicted minimum of Algol.  So after the conference ended I set up my camera and recorded about an hour of photos immediately up to the minimum.  After gathering twenty seven 20 second pictures at three minute intervals I converted the .raw files to .tiff files using photoshop.  I was able to analyze these images using SalsaJ and came up with some encouraging data.


Below is a quick time lapse of the images I took.  Some of the pictures were effectively ruined by transient clouds but enough suitable images were obtained to provide a rudimentary proof of concept. 


Using the best 7 data points I was able to using the photometry features of SalsaJ to gather the data below:
 
Image # Start Time Target Intensity Comparison Intensity Magnitude Ratio
1 21:53:00.00 3519840 4879236 0.72139
2 22:55:00.00 3402002 4836478 0.70340
3 22:57:00.00 3819125 5215910 0.73221
4 22:59:00.00 3773813 5597030 0.67425
5 23:01:00.00 3691644 5714231 0.64604
6 23:03:00.00 3980940 6143964 0.64794
7


8


9


10


11


12


13


14


15 23:27:00 2907813 4760742 0.61079
16


17 23:33:00 3614116 6708249 0.53876

For the photometric analysis the comparison star was Mirfak. Using the ratio of Mirfak to Algol during the image run I created the light curve:


Analysis:

These results are encouraging. Even though the weather resulted in a large gap in the data and there are relatively few points, they consistently show a decrease as the expected minimum approaches.   I'm further encouraged because of the specific results of the photometry.  Mirfak is not a variable star and has an apparent magnitude of 1.8. At its minimum Algol has a magnitude of 3.4.  The ratio of magnitudes of Mirfak/Algol at the minimum of Algol is 0.529 which is very close to 0.538. The deviation could easily be explained by the time difference between my last observation (11:33 pm) and the time of the expected minimum (11:54) or the effects of clouds on the observations.

Conclusion:

While this isn't conclusive I'm quite encouraged by my results.  I've been convinced this method will eventually yield successful results when the weather and transit times allow me to make further observations. If you have any suggestions or comments I'd be happy to hear them.

Sunday, September 30, 2012

Fall Observing

I've been busy the past 6 weeks. And thankfully much of it has been observing.  Anyway, I'm going to keep this short and simply post a few of the pics I've taken.  More to come on them later.


Telescope: Celestron Edge 11"
Mount: Skywatcher EQ6
Camera: Hutech modified Canon T3i
Exposure: 14 x 5 min at 1600 ISO


Telescope: Televue 85 mm
Mount: Skywatcher EQ6
Camera: Hutech modified Canon T3i
Exposure: 11 x 5 min at 1600 ISO


Telescope: Televue 85 mm
Mount: Skywatcher EQ6
Camera: Hutech modified Canon T3i
Exposure: 13 x 5 min at 1600 ISO
Camera: Canon xTi
Mount: Canon camera tripod
Exposures: 65 x 1 min exposures combine using startrails

Tuesday, August 21, 2012

Deep Sky with the Edge 11"

Its been a busy couple of months.  My wife and I finally moved back to Edmonton and for the past two weeks or so I've been reaping the astronomical benefits.  The skies were ridiculously clear, if not extremely humid.  Dew has been a major problem but not so much as to stop me from Stargazing.  I spent three or four nights out at the Blackfoot Staging Area (its one of the local RASC observing sites) testing the conditions and starting to put my 11" Edge through its paces.  I also got to catch the Perseid meteor shower! What an amazing night.  I brought my wife and several friends with me and in a few hours we saw dozens of meteors, the International Space Station, Jupiter, the Moon, the Milky Way, and about half a dozen deep sky objects.

I also noticed a few other things

1)  My old battery is basically dead.
2) The new site is quite a bit better than the site I had in Vancouver
3) The Edge is an amazing telescope

I'll write a post soon about how I overcame my dead battery because rather than buy a new one I actually built my own astronomical power station.  For now I'm just going to post a few pictures I took from the Blackfoot Staging Area.  There are a few Deep Sky objects like the Dumbbell Nebula and the Iris Nebula along with a wide angle shot. I would have like to do longer exposure but as I mentioned before dew was really becoming a problem.

11 x 5 min @ 1600 ISO

 10 x 5 min @ 1600 ISO
2 min exposure with Rebel xTi with 16mm Lens

The last picture was actually a series that I planned to use in a short time lapse.  The object in the foreground is my telescope with the Milky Way in the background.  The bright streak across the sky is the International Space Station. I had intended the time lapse to be quite a bit longer but again, the dew got in the way. So here is the 5 or so seconds of the movie.

Didn't turn out to badly but by the end you can start to see the effects of the dew on the camera lens. Of well, hopefully as we move into the fall dew will be less of a problem.

Monday, June 18, 2012

Sun Spots

The Transit of Venus came and went and much to my extremely disappointment the weather in Vancouver well, disappointed.  The end result was that I missed the Transit.  Nothing but clouds and rain.  Since then the weather has cleared up slightly, which is to say every now and then you can see some patches of blue.  This frustrates me on several because I bought a white light filter for my new 11" telescope that I really haven't been able to use.

Well, today I spotted a break in the clouds and made good use of the brief appearance of the sun.  The first picture shows about a quarter of the solar disk.  In the center of the picture is active region 1504 which contains about half a dozen sun spots.  Below and to the left there are a few more faint sunspots.  Presumably each of these sunspots have some sort of active prominences or flares but we can't see them in white light.  


This is a close up of active region 1504 taken through my 11" SCT with a canon T3i using a 2x Barlow.  I would have liked to do a few more high resolution shots but tracking, wind and eventually clouds made than impractical.  Fortunately the sun isn't going anywhere!


Sunday, May 20, 2012

The Sun in HA

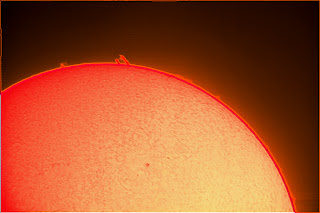
With the transit of Venus coming up in a few weeks I decided to take my solar telescope out. For those of you who have never heard of Coronado's (now Meade's) Personal Solar Telescope I'd encourage you to check it out.  It runs for about $500 and is one of the cheapest ways to look at the sun in Hydrogen Alpha.  Although it gives a tiny, full disk view of the sun its the easiest way to see solar flares and prominences that aren't visible through a white light filter. 

Anyway, its not designed for imaging because its nearly impossible to get a camera's chip close enough to the focal plane.  However, for anyone interested it is possible to do: you need to add a Barlow lens to your image train.  I actually used a 5x powermate last Sunday and got some absolutely stunning images of flares and prominences.  If your interested in the sun, this is really the best way to look at it without spending thousands of dollars. 


One of the things I found most interesting about these pictures was when I compared them to my earlier attempts.  Its nice to know that I'm actually getting more proficient at using my camera and telescopes.


 Not only do the new pictures show more solar detail but they are also taken with larger format camera and almost at a size I could print.

Saturday, May 12, 2012

M51

M51 and the new Edge

Over the course of 2 days I spent close to 16 hours on Mount Seymour stargazing.  A significant portion of that was used to image M51 and the M57 to try and test out the optics on my new Edge 11" telescope.  Unfortunately I also noticed that my motorized focuser kicked the bucket so I now either need to repair or replace it; focusing a SCT with the standard mirror control is unbelievably frustrating.  Anyway, M51 presented me with a great opportunity to compare the quality of my old Celestron 8" with my new 11" because just a few months before I imaged M51 with the old scope.  And as an added bonus I even have an image of M51 through my Televeue 85 mm.

The two SCT telescopes imaged M51 for about the same amount of time so the images are pretty easy to compare. 
M51 through Edge 11" - 12 x 5 min
M51 through Celestron 8" - 15 x 3 min

M51 through 85 mm Televue 12 x 3 min

Comparing these shots I'm definitely the most impressed with the Edge, but it is also the scope that needs the most work to use.  Its bigger, which makes it more difficult to set up (and the mount is quite a challenge to physically move when polar aligning).  The longer focal length also means it needs to be better focused, which is why my motor focuser really needs to be fixed.  I'm quite excited about the prospects of continued imaging through it!

Monday, May 7, 2012

The Super Moon

I don't know why but for some reason the media really picked up on the full moon this month.  Because the full moon occurs when the moon is at perigee (its closest point to Earth) its called a 'super moon', but really its not that special.  This particular lunar configuration happens quite often and it would be really difficult to spot the 15% increase in size. I was quite interested in setting up my new telescope (an 11" SCT on a EQ6 mount) and testing it out.  Because I was just working the kinks out of the new setup I didn't really want to drag it all the way up the mountain so I chose a community league parking lot close to my house.  My plan was to take some shots of the moon and then try a Light Pollution Reducing filter and see how things in the city worked out.  Unfortunately I made a little mistake; I never labelled which filter was which in my filter wheel and ended up doing all the imaging through a narrowband OIII filter. Sadly, the result was not good.

The moon however turned out quite nicely!


Saturday, March 24, 2012

Imaging with my 8" SCT

I felt just like a bear coming out of hibernation yesterday. For the first time in many months a group of friends joined me up on Mount Seymour for a great night of stargazing. I had a hard time deciding whether or not I was going to use my 8" Schmidt-Cassengrain telescope or my 2.5" Refractor.  After much thought I settled on the 8" telescope simply because I haven't had much of a chance to use it for imaging.

Ironically most of the pictures I've taken have been through my much smaller (although much nicer!) TV85. However I wanted to get some practice imaging with a long focal length so  I packed up the 8" and dragged it up to the mountain. The results were encouraging but not stellar (no pun intended) mostly because the freezing temperatures drained my computer battery and stalled my imaging session. I started out trying to image a faint group of galaxies called the Hickson 44 group. 

Given that the galaxies in this image are rather faint (the brightest one is magnitude 11.4) and I took about 1/10 the exposures that I wanted to I'm relatively pleased.  The focus and tracking were both pretty good.  However I did realise two things; first there is something on either my camera or my telescope because I can see some dark spots that are obviously not part of the picture.  Second its obvious that my SCT is not designed for photography; The field is curved and only the center of the field is suitable for photography. That being said I'm still pretty happy since this is my first serious attempt at using my SCT for imaging.

The second image I took was sort of ad hoc. I wasn't planning on shooting anything in Ursa Major but because of the way the light pollution from the city and the ski hill were working it was the only place there was dark sky.  Again, I got about 1/10 the exposures I needed but it just confirmed that my SCT can be used but not particularly well.

Tuesday, February 28, 2012

Christmas in Alberta

During the holidays I packed up my telescope and drove 1500 km back to my hometown of Edmonton. The weather cooperated quite nicely and even though I was only there for 5 days I managed to cart my telescope out to Elk Island Park.  Yes, it was snowy and yes, it was cold but the sky was clear and the lack of moon made for some terrific seeing. 

I was managed to take about 45 minutes of photos of IC 1805 before I literally got scared off by a pack of wolves.  That in itself is an interesting story; unfortunately because I got about 1/4 the exposure time I wanted the image is quite dim.  But its still noticeable.  I guess the nice thing is all I really need to patience.  The nebula isn't really going anywhere.

Tuesday, February 7, 2012

Registax

Its almost universally known that the easiest way to take high quality pictures of the moon or planets is using a small webcam.


The webcam is used to take a video which is essentially hundreds or thousands of individual pictures.  Computer programs like Registax look through all the individual pictures and pick out the highest quality images (the ones with the least atmospheric degradation, best focus, least movement) and stack those into one image. 

Although I've managed to get some nice pictures of Jupiter and Saturn this way it would be extremely difficult to get a complete image of the moon, particularly with any detail..  This is mostly due to the very small size of the image generated by the webcam.  The field of view is incredibly small; great for individual craters but impossible for the entire moon.

My previous post showed a high resolution image I am working on using Registax and my DSLR.  Instead of using a webcam I took about 100 shots of the moon on my DSLR and loaded them into Registax. At first this basically overwhelmed Registax and my computer's processing power.  Registax is designed to process pictures that are around 100 kb and I was loading pictures that were 18 Mb.  After a bit of fiddling around I found a way to get Registax to chug through them; there is a stacking option to use the minimum file sizes possible.  This isn't usually an issue when stacking tiny files from webcams but in this case it was an absolute necessity. If your using Registax version 6 its also a good idea to chose a small number of alignment points.  On a lunar shot you can get several thousand points but you really only need less than two dozen for decent alignment.  If you use the default alignment setting it will take forever to finish the alignment and stacking processes.

Even on my Quad-core desktop the processing took a while.  But once it was done I had one piece of my lunar mosaic.  Even with the wide field my DSLR gave me it only covered about 1/4 of the moon.  I repeated the imaging and stacking 4 more times and then had to stitch the final images together.

I accomplished this with the help of a great program called iMerge (although others have told me it can be done in Photoshop).

I'm still working on getting the colour better corrected and then I might restart the entire project with a barlow attached to get a slightly larger image.  It depends how long the post-processing takes.

Sunday, February 5, 2012

High Resolution Lunar Picture

After nearly 2 months of almost constant rain it finally cleared up.  And wouldn't you know it, it was about 3 days before a full moon.  So rather than do some maybe marginal deep sky photography I opted instead to try some high resolution shots of the lunar terminator (basically the line that separates the shadow from the illuminated part of the moon). Using my DSLR it took a while before the pictures would stack properly (more to come on that later) but eventually I managed to get three nice shots of difference parts of the moon.  Using a great program called iMerge I was able to combine those shots into one nice panorama shot of the moon.  I'm still working on getting the colours to seamlessly match so you can still tell where the different shots overlap. 

Unlike many of the other lunar pictures I've taken this one is relatively high-resolution.  If you download the picture you can actually zoom in on many different parts of the surface, particularly around the terminator and get some amazing lunar vistas.