Sunday, June 22, 2014

Suburban Star Gazing at its Finest

Over the past few weeks I've been really pushing to put the 'finishing' touches on my observatory (although if you asked my wife she would just roll her eyes; deep down she knows it will never REALLY be done).  The latest and most time consuming addition has been moving from the tripod simply resting of the observatory floor to a separated concrete pier.  With the help of my brother and brothers' in law I was able to get the piling poured and all the equipment back in the dome in just under two weeks.  Despite yesterday being the summer solstice (and the shortest night of the year) I got to test it under beautifully clear skies.  The rest was amazing!  The alignment is still off by about 40 or 50 arcseconds but it definitely works well enough for simple pointing.  I can't wait for darker skies in the fall!

The video below is a short time lapse of the pier construction.  I realised after the fact that it was a bit too far away to provide much detail of the actual construction process but it was actually a lot simpler than I first thought.


I had to go back and make some minor changes though.  We put the anchors in the wrong spot and initially, the polar axis was impossible to align.  Rather than take the entire piling apart or chisel out the anchors I just tapped a couple new holes in the base plate and now it works perfectly!


After the concrete set and the mount was installed I brought in all the optics and electronics.  I had to build a small table for the computer monitor since my initial shelf didn't have enough clearance.  Providing AC power to the observatory was straightforward - just rewired an existing outlet and run the line into the dome.  I still want to add some dim, red lights in the interior but that can wait for another weekend.

Other than that, the Observatory is now full stocked and operational!  The specific details are below:
Mount: Skywatcher EQ8
Telescopes: Celestron Edge 11" & Skywatcher Espirit 100 mm
Cameras: Lumenera Lu135m, SBIG STX2000XM & Lodestar autoguider
I've also got a variety of narrowband and LRGB filters along with a couple white light solar filters.

(View from my chair)
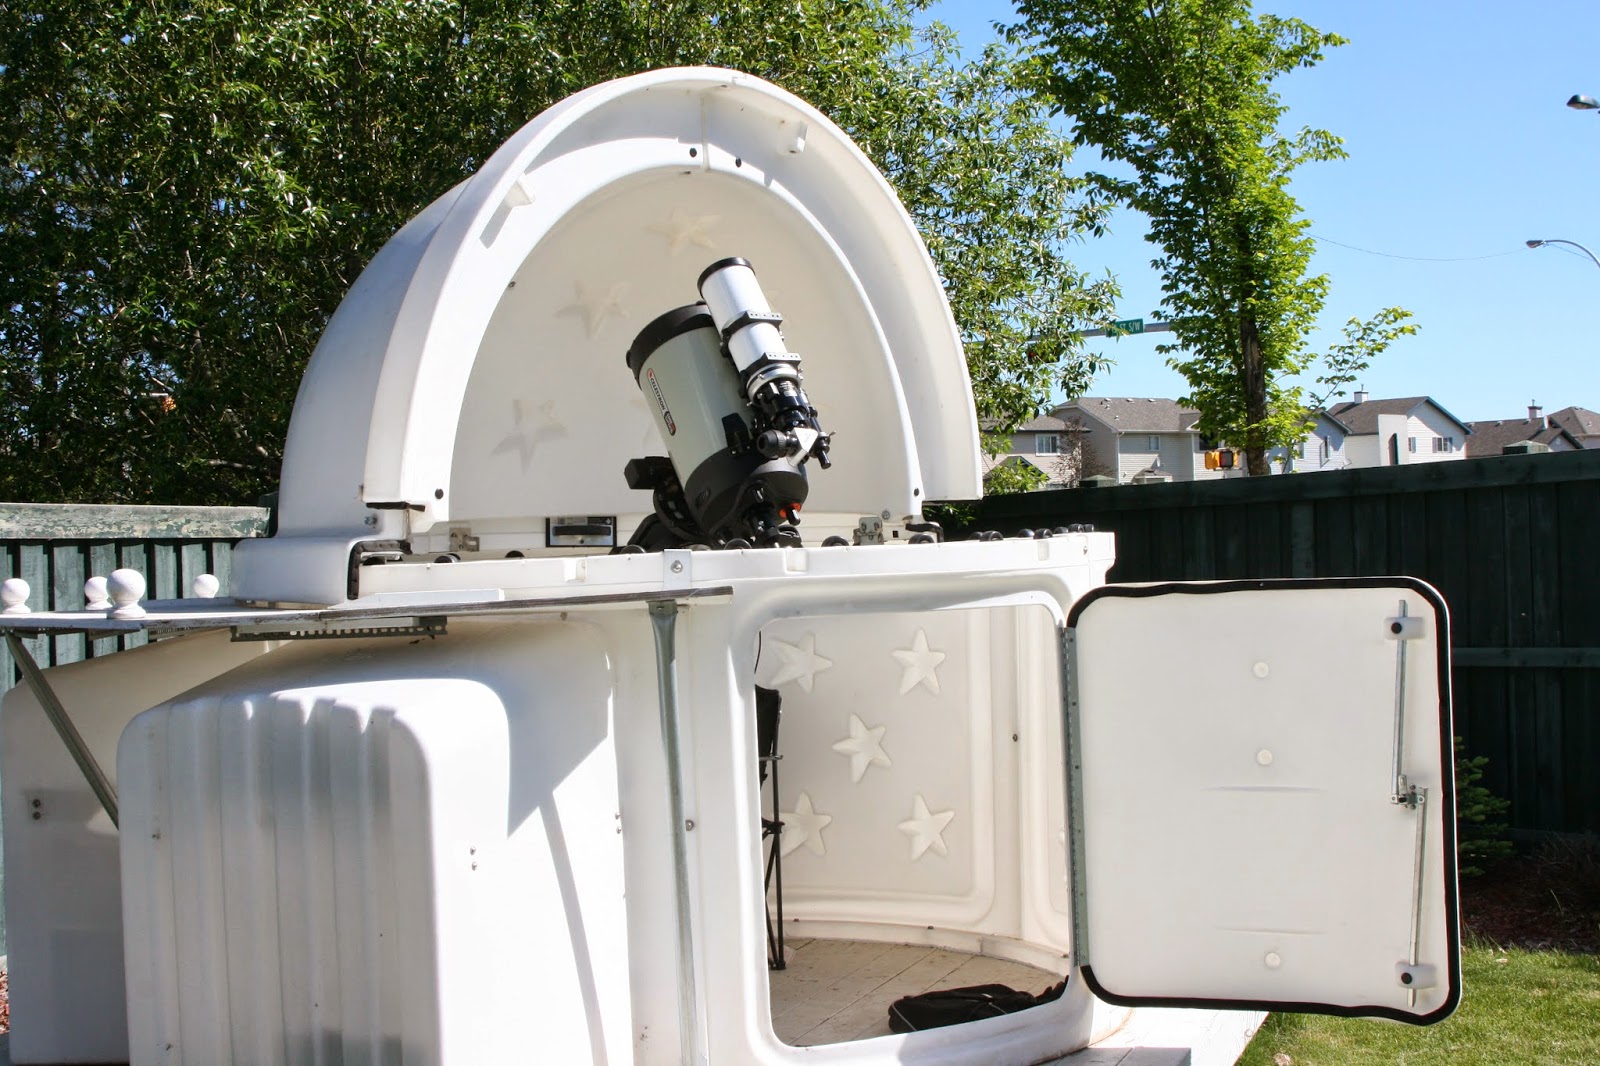
(The telescopes)


(My wife loves the fact that most of my gear can be stored out of sight now!)


The only thing I think I'm 'missing' is a nice HA solar telescope.  Alas, I think the limits of my wife's indulgence has been reached for the time being.

In addition to my usual astrophotography I've been dabbling in photometry and spectroscopy (although with the short nights of summer and the terrible spring weather, the past two or three months haven't seen near as much stargazing as I'd like.  However, by August or September, I hope to pick up where I left of in April and continue doing some Exoplanet observing.  Now, with everything set up and ready to go, hopefully things will be much simpler.

The only downside to this exciting project is the fact that its not really under dark skies. The suburban Edmonton skies are only about a magnitude 3 or maybe 4.  Still, I've done some excellent narrowband imaging last year and with an 11 month old baby I don't have the same flexibility as I used to; late nights for me now mean changing diapers and crying babies instead of nebulae and galaxies. 

Tuesday, June 10, 2014

Planetary Imaging

A couple of years ago I bought a Lumenera Lu135 industrial camera and retrofitted it for planetary imaging. All that really involved was putting a 1.25" barrel on it that I bought from Xagyl Instruments (I love supporting Canadian companies!).  Its an amazing camera! For just under $300 I acquired a camera that would have cost me over $2000 if it was specialized for Astronomy.  In fact, you can compare the Lumenera Skynx 2.0 and the Lu135m cameras.  They are virtually identical except the Skynx is marketing for Astroimaging while the Lu135 isn't.  (It also helps that I got my camera used on ebay).

Since its a monochrome camera taking colour photos was a bit of a challenge.  It involved taking on series of photos with a Luminence filter (essentially just a UV/IR filter) and then one each in Red, Blue and Green; hence the name LRGB.  It was a bit frustrating to remove the camera, unscrew a filter, screw in the new one, replace the camera, correct the orientation and then refocus it.  Then about a month ago I bought a manual filter wheel and a cheap set of LRGB filters from Meade.  Right now Meade is selling the LRGB set for under $30.00. Its a steal if you're looking to get into LRGB imaging.  They aren't quite the same quality as something from Astrodon or Lumicon but at 1/10 the price I'm not going to argue.

Anyway, a few months ago I took some decent pictures of Jupiter and then just last week I started pointing my telescope towards Saturn. The 4 images below are the Luminence, Red, Green and Blue images I took.  They aren't in colour, just taken through colour filters.  Then using a program like Photoshop or Nebulosity each image is mapped into a colour channel.  The three colour channels (RGB) are combine with the Luminence image to create a composite colour image.


Luminence


Red


Blue


Green


The composite colour image is below.  I think my exposure time was too long so the images are slightly overexposed.  Its also unfortunate that Saturn is very low in the Southern horizon right now.  Double bad is that because its the middle of summer it doesn't get dark out until around midnight.  This means there are few, if any, really good opporunities to image Saturn.  And even then Saturn is only about 25 degrees above the horizon.  Jupiter on the other hand was well above 60 degrees.  That made for less light pollution and less atmosphere to shoot through.  Ditto for Mars.


Saturn LRGB

I've also included a shot I took of Jupiter and one of Mars.


Jupiter shows a lot more detail because it much bigger than Mars.  In fact even through a small telescope or binoculars its possible to see the four moons Galileo first looked at more than 400 years ago.  Despite the smaller size, the image of Mars is really quite interesting.  You can clearly see the Northern and Southern Ice caps along with some darker highlands and lighter plains.  The white ice caps are actually made not of water but mostly frozen Carbon Dioxide!