Saturday, August 29, 2015

Solar Observing

Summer in Edmonton means lots of long, lazy days.  Which translates into almost no opportunities for actual STAR gazing.  Unless you choose to look at the Sun.  And unless you know what you're doing its not a smart thing to do. Fortunately I sometimes actually do know what I'm doing.
Sun in White Light.  A 99.9% filter was used.  The dark spots are sun spots.

If you're ever interested in looking at the sun there are a few things you need to know.  First, and I can't stress this enough, it can be DANGEROUS.  Blindly so.  Once, several years ago, I projected the sun onto a white piece of paper to show a student what sun spots looked like.  If you keep the paper far enough away from the eye piece it is quite easy to do.  After a couple of seconds I took the paper away and was doing some explaining.  I made the mistake of  moving my hand in front of the telescope eyepiece (which was still pointed at the sun) and in less than a second I had myself a second degree burn.  The point is, unless your are confident in what you are doing, don't.  You can literally go blind.

Despite this, its actually quite easy to observe the sun.  Go to any hardware store that sells welding equipment and get a piece of Number 12, 13, or 14 welder's glass (which I'll call a solar filter from now on since that's what we're using it as).  Don't get anything less! These types of glass are dense enough to block out the dangerous UV light coming from the sun. Others are not.  Once you have said piece of glass, hold it up to your eyes and find the sun.
Sun in HA showing a nice Prominence on the right


Using Welder's glass will not magnify the sun however.  So what you'll see will probably lack any significant detail.  I have only once ever seen a sunspot big enough to see just by using a filter.  To get a better view, you could attach two solar filters in front of each lens of pair of binoculars.  Now you should be able to see some black grains on the surface of the sun.  No, your binoculars are not dirty! Those are sun spots.

For even more detail you'll need to step up to a full sized telescope with a proper solar filter (you could of course still use Welder's glass but it would be difficult to find a piece big enough; in addition I would worry about a makeshift filter falling off the telescope). Depending on the size of you're telescope you should be able to see quite a bit of detail! The surface of sun changes for a variety of reason; like the Earth, the sun rotates so we see different faces of the sun at different times.  In addition the energy produced deep inside the core of the sun is always seeping to the surface; this creates convection currents, radiation and powerful magnetic fields that shape the surface.  If you're fortunate enough to have a telescope 6" in diameter or larger you'll probably notice there are two distinct parts of Sun Spots.  The darker central part is called the Umbra while the dimmer outer layer is the Perumbra.

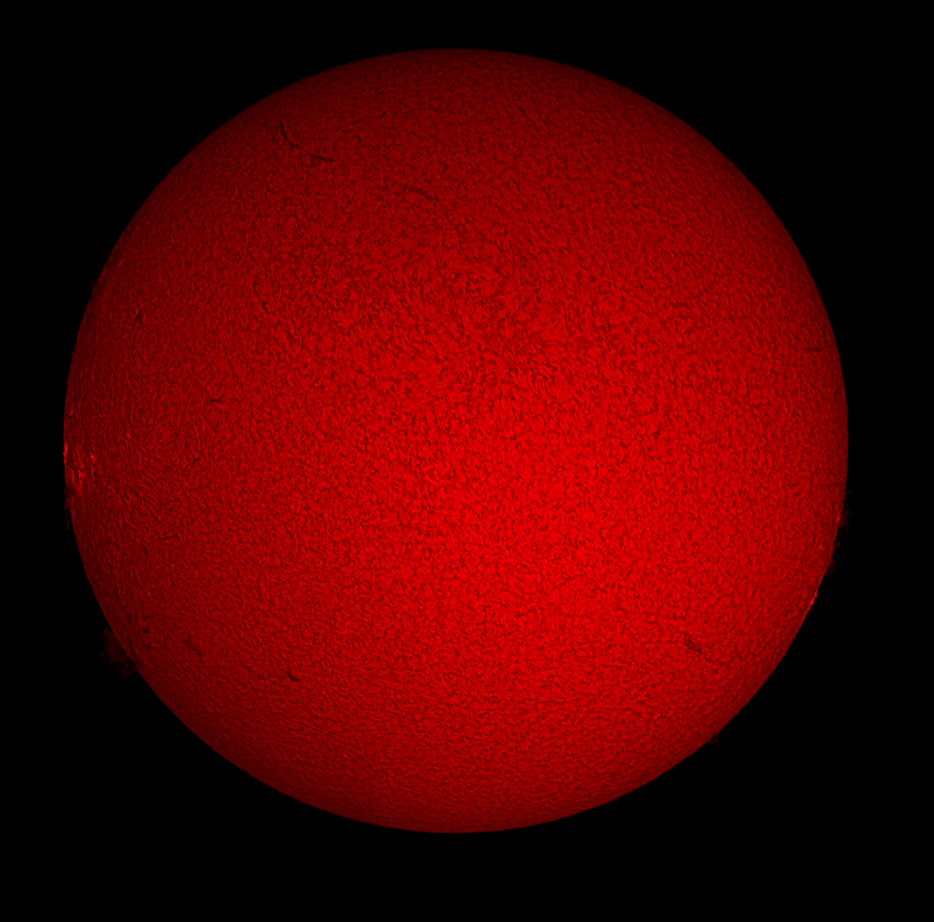
Sun in HA showing granulation and Spiculas and Filaments
However, none of these observational methods will allow you to observe Solar Flares or Prominences which occur in the sun's atmosphere or Corona.  To do that you need a highly specialized filter known as a HA filter.  This filter is designed to block out all the light from the sun expect the light at 656.28 nm.  This is caused by a specific transition that occurs when an electron in the third energy level of Hydrogen falls back to the second energy level (its part of what is known as the Balmer Series).  Recently I purchased a telescope with a dedicated Hydrogen Alpha Filter; a Meade double stacked 60 mm SolarMax telescope..  I haven't had more than a handful of opportunities to use it but so far the views are absolutely breathtaking!

A completely different type of solar observing involves using a Spectroscope (see my previous post on homemade Spectroscopy) to see the Solar Absorption Spectrum. The spectrum below was taken using my homemade spectroscope and calibrated using RSPEC.

Looking at the spectrum you'll see that's its not completely continuous. There are black lines, called absorption lines mixed in with the colours.  This is due to 'missing light' that was absrobed by gasses in the solar atmosphere.  By looking carefully at this spectrum and comparing it to  the spectrum of elements on Earth it is possible to find out what the sun is made of without actually going there (which would not be conducive to healthy living).  When scientists do this we find the majority of the sun is made of Hydrogen and Helium with very small amounts of other elements like Sodium, Oxygen and Iron.

All of these are exciting and interesting ways to look at the closest star to Earth, our sun!


Saturday, March 28, 2015

High Resolution Spectroscopy

This post isn't really about Astronomy but it's definitely related to the Rainbow Optics diffraction grating I bought last year.  Plus Atomic Spectra is just so cool that you can't not like it!

About six months ago a friend of mine gave me an article he wrote for the Journal of Chemical Education explaining how to build a high resolution spectroscope with materials you find around your house (with one exception). The construction process wasn't particularly difficult, but my meager woodworking skills meant it took a lot of time.  Eventually I asked one of my students to help me since he was in the middle of a woodshop course at school. 

The spectroscope itself is fairly simple.  Its a Littrow-type spectroscope that contains a single slit for light to pass through, a mirror, a lens, a high resolution diffraction grating and a focuser/lens.  After a few months I tweaked the focuser a bit so I could use a camera with it. 

The photo below is taken directly from the article (Vanderveen, Martin & Ooms, 2013) and shows all the pieces necessary to build the spectroscope.
The basic parts list as well as the approximate cost is below:
  •  1/2" plane wood ($15)
  • Screws, nuts, bolts of various sizes ($5)
  • Knife or Razor blades ($5)
  • Plane mirror ($5)
  • Collimating lens ($15)
  • Diffraction Grating ($130)
  • Focuser ($20)
  • Eyepiece ($15)


The spectroscope operation is fairly simple.  Light passes through a slit created by the two knife blades.  It is reflected 90 degrees by the plane mirror and travels through the Collimating Lens (I used an old photocopy lens).  It strikes the reflecting diffraction grating and is sent back through the lens and out to the eye piece where the spectrum can be seen or photographed. In actualilty putting everything together was a bit more challenging then it sounds; the biggest difficulty was getting the light rays to strike the mirror and diffracting grating at the right angle so it missed the edges of the lens and was sent back straight through the focuser.  All it took was a bit of tweaking but it ended up taking a lot of time.


Visually observing spectra was dead easy. However photographing it proved to be quite the challenge.  At first I was set on using my DSLR camera but that proved to be untenable.  The camera body was simply to large and in combination with the focuser I was using couldn't get the chip close enough to the lens inside the spectroscope to properly focus.  But once I switched to my Lumenera camera, which has a much smaller body, it was a breeze.  In addition to imaging the spectrum seen through the spectroscope I used the program RSPEC to further analyze it.  After some basic calibration it was clear that this spectroscope has a very high resolution.

 This is a calibration spectrum I took of a Compact Florescent light in my kitechen Despite other abient light from the windows and virtually no processing its very easy to identify several elements in the spectrum. 

Below my spectrum is a laboratory refrence of a CF bulb.  As you can see its very easy to identify the peaks!

Once the weather clears up I plan to take the entire set up outside and see if I can pull the Fraunhofer lines from the solar spectrum.  See! I told you there was an astronomy bent to this!