Its almost universally known that the easiest way to take high quality pictures of the moon or planets is using a small webcam.
The webcam is used to take a video which is essentially hundreds or thousands of individual pictures. Computer programs like Registax look through all the individual pictures and pick out the highest quality images (the ones with the least atmospheric degradation, best focus, least movement) and stack those into one image.
Although I've managed to get some nice pictures of Jupiter and Saturn this way it would be extremely difficult to get a complete image of the moon, particularly with any detail.. This is mostly due to the very small size of the image generated by the webcam. The field of view is incredibly small; great for individual craters but impossible for the entire moon.
My previous post showed a high resolution image I am working on using Registax and my DSLR. Instead of using a webcam I took about 100 shots of the moon on my DSLR and loaded them into Registax. At first this basically overwhelmed Registax and my computer's processing power. Registax is designed to process pictures that are around 100 kb and I was loading pictures that were 18 Mb. After a bit of fiddling around I found a way to get Registax to chug through them; there is a stacking option to use the minimum file sizes possible. This isn't usually an issue when stacking tiny files from webcams but in this case it was an absolute necessity. If your using Registax version 6 its also a good idea to chose a small number of alignment points. On a lunar shot you can get several thousand points but you really only need less than two dozen for decent alignment. If you use the default alignment setting it will take forever to finish the alignment and stacking processes.
Even on my Quad-core desktop the processing took a while. But once it was done I had one piece of my lunar mosaic. Even with the wide field my DSLR gave me it only covered about 1/4 of the moon. I repeated the imaging and stacking 4 more times and then had to stitch the final images together.
I accomplished this with the help of a great program called iMerge (although others have told me it can be done in Photoshop).
I'm still working on getting the colour better corrected and then I might restart the entire project with a barlow attached to get a slightly larger image. It depends how long the post-processing takes.
Tuesday, February 7, 2012
Sunday, February 5, 2012
High Resolution Lunar Picture
After nearly 2 months of almost constant rain it finally cleared up. And wouldn't you know it, it was about 3 days before a full moon. So rather than do some maybe marginal deep sky photography I opted instead to try some high resolution shots of the lunar terminator (basically the line that separates the shadow from the illuminated part of the moon). Using my DSLR it took a while before the pictures would stack properly (more to come on that later) but eventually I managed to get three nice shots of difference parts of the moon. Using a great program called iMerge I was able to combine those shots into one nice panorama shot of the moon. I'm still working on getting the colours to seamlessly match so you can still tell where the different shots overlap.
Unlike many of the other lunar pictures I've taken this one is relatively high-resolution. If you download the picture you can actually zoom in on many different parts of the surface, particularly around the terminator and get some amazing lunar vistas.
Unlike many of the other lunar pictures I've taken this one is relatively high-resolution. If you download the picture you can actually zoom in on many different parts of the surface, particularly around the terminator and get some amazing lunar vistas.
Sunday, December 11, 2011
Lunar Eclipse
This past weekend we (as in all of us on Earth) were treated to a lunar eclipse. At least those of you who lived in a non-cloud infested city were. The eclipse started at about 4:45 am and ended about 6:30 am in Vancouver. Unfortunately from the vantage point I chose I only got to watch it for about 25 minutes before clouds rolled in a covered the entire sky. Its actually doubly sad because this is the last lunar eclipse until sometime in 2014.
Despite the poor seeing conditions I did manage to see about 1/4 of the eclipse and I'm thankful for that. I set up my telescope and camera in Terra Nova park in Richmond. I was planning on taking a nice mosaic of the eclipse at different times but this was thwarted by the clouds. And my poor choice of cameras. Out of haste I grabbed my modified T3i which has the IR filter removed. The result is a noticeable reddening of the moon even though it should be a nice off white until totality (which I missed). Anyway since I missed the majority of the eclipse I've only included one of the unedited pics I took just after the eclipse started. Enjoy!
Despite the poor seeing conditions I did manage to see about 1/4 of the eclipse and I'm thankful for that. I set up my telescope and camera in Terra Nova park in Richmond. I was planning on taking a nice mosaic of the eclipse at different times but this was thwarted by the clouds. And my poor choice of cameras. Out of haste I grabbed my modified T3i which has the IR filter removed. The result is a noticeable reddening of the moon even though it should be a nice off white until totality (which I missed). Anyway since I missed the majority of the eclipse I've only included one of the unedited pics I took just after the eclipse started. Enjoy!
Friday, December 2, 2011
Second take at Orion
Orion Nebula, Year 2.
Last year when I seriously started astrophotography the Orion nebula was my first real target. Its bright. Its easy to find. And it looks really cool. However its also really hard to get a decent image of. Mostly because the stars that make up the Trapezium (the bright central part) overwhelm the more diffuse, dim outer layers. This was my second attempt, and due to a malfunctioning autoguider, shifting tripod and really cold temperatures it was limited to about fifteen 30 second unguided exposures. Still, its worlds better then last years shots. I've put the two shots side by side for easy comparison.
Sunday, September 4, 2011
Fall Astronomy
With the start of September I guess its fair to say that fall has begun. Ironically the weather is more like what should be expected in the middle of July. Warm, clear days with nights perfect for stargazing. Ironically I have to go back to work in a few days and my stargazing nights will be mostly limited to weekends. However this past weekend I did my best to get out and enjoy the wonderful fall sky; over two nights I spend more than 10 hours staring up at the stars. I've also decided that I really should replace my LVI autoguider. There are definitely better, more user friendly autoguiders out there. So that will be my next major purchase. This realization came while I was trying to image the Pelican nebula (below).
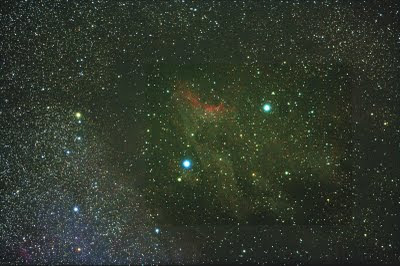
 Its a bit difficult to really make out. The nebula didn't turn out quite as well as I had hoped, particularly in comparison to the North America Nebula which is right next to it (and something I imaged when I was in Merritt). Despite the fact that this was nearly an hours worth of images I'm guessing that because the Pelican Nebula is mostly HAII my unmodified camera wasn't able to really gather all the light that it should have. That and because this was taken from Mount Seymour and not and dark sky site like Merritt.
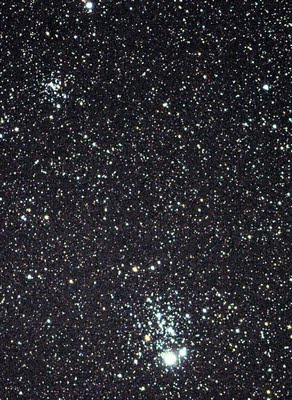
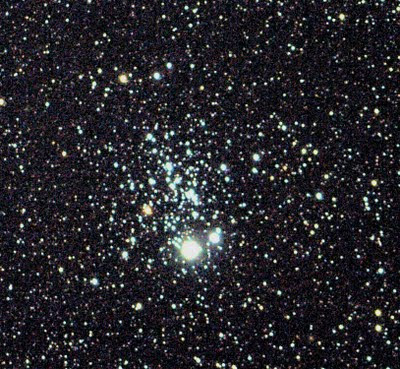
In addition to this photo I also took some time to shoot the Eskimo Cluster (NGC 457) and another nearby small cluster. These ones aren't quite as well suited to a wide field scope like my TV85 but they still turned out reasonably well. Still they turned out alright. I guess if you use your imagination you can see why the cluster was given the nickname of the ET cluster.
Tuesday, August 30, 2011
Merritt Star Quest

Last weekend I spent three days at the Merritt StarQuest. The weather and skies were absolutely beautiful! Luckily I brought enough clothes because I wasn't really expecting the huge temperature swing that we had. During the day the high was around 35 degrees but by 2:30 am the temperature was down around 5 degrees. Asides from the night time lows, the skies were brilliant. The Milky Way was so bright it was often a distraction from the rest of the sky. I can't wait until next year! Hopefully the weather will allow for more nights of stargazing!
The first night was largely used in polar aligning my telescope, setting up my autoguider and in general getting ready to observe. I was quite frustrated with my autoguider, which I'm now planning on replacing. Fortunately a friend of mine had an extra autoguider that I was able to test out which worked quite well. After much cursing and frustration I finally managed to get a few decent pictures.
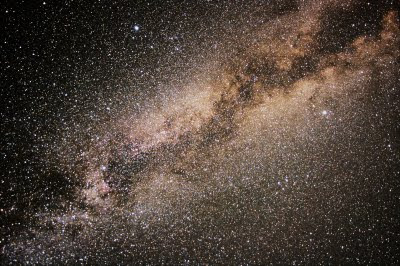 This is a composite of 4 five minute shots of the milky way taken with an 18 mm lens on my Canon rebel xTi. In order to avoid star trailing the camera was mounted on my HEQ5 tracking mount.
North America Nebula
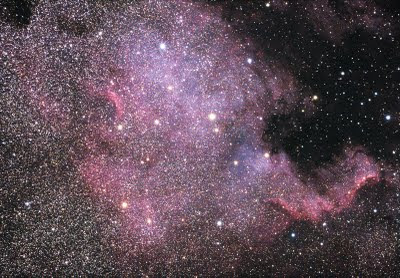 This is 8 five minute exposures through a TV85 taken with a Rebel xti.
Pleiades
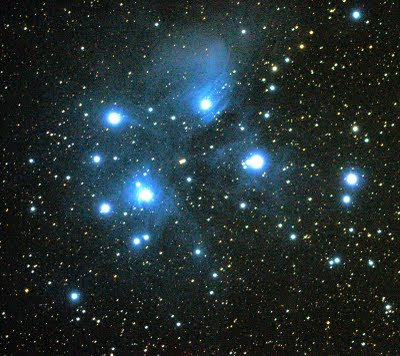
3 five minute images through my TV85 with a Rebel xTi
Friday, August 5, 2011
More summer astrophotography
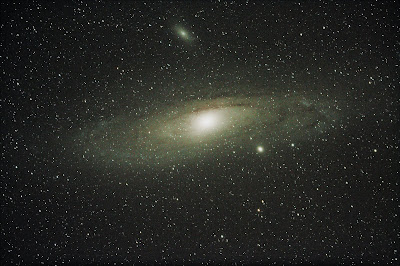
Since the beautiful west coast weather continues so to do the opportunities to take pictures. The latest include a few more shots of Andromeda and the Whirlpool Galaxy as well as a new target: the North American Nebula. I think I've finally got my autoguider working correctly and so far am reasonably pleased with how its going. Hopefully I'll have one more opportunity before I leave for Spain!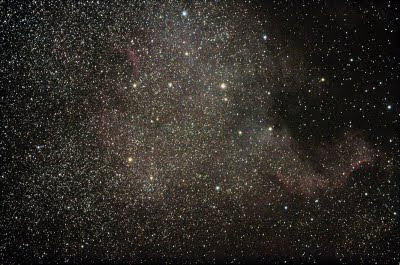


Subscribe to:
Posts (Atom)


